Friday, September 28, 2018

My Stampin' Up! Framelits Dies Storge Tutorial - DIY


Hello everyone and Happy Friday!

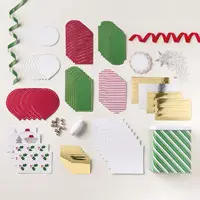
I was asked by a customer how I store my Stampin' Up! Framelits Dies and if I use magnet cards.  The answer is yes, I do use magnet cards. There are different options. I hear Stamp-n-Storage has nice ones and I believe in different sizes.  The 5" x 7" set comes with ten (10) magnet cards, two chipboard dividers and 15 self-adhesive labels for $22.75. 

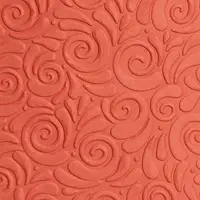
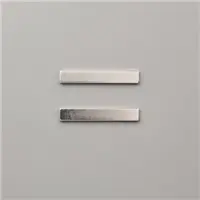
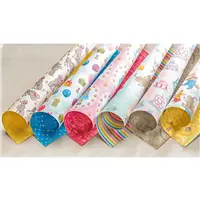
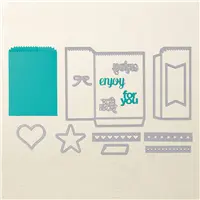
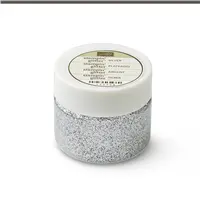
I make my own using magnetic vent covers from Home Depot. The package comes with three (3) 8" x 15" long magnetic strips.  You may cut them any size as you see fit. I cut each strip into three (3) 5" x 6 1/8" (as shown above). So a total of nine (9) for $4.98.

Magnetic Vent Covers


Magnetic Sheet


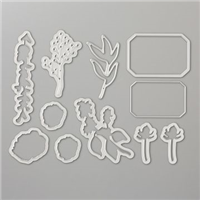
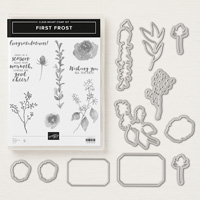
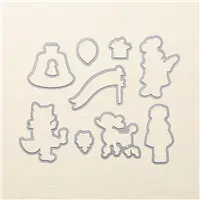
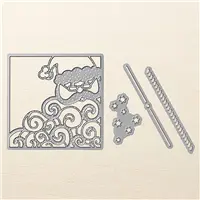
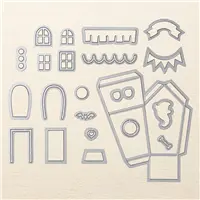
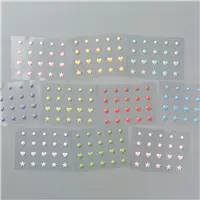
After I cut the magnetic strips and put the Framelits Dies on them, I store them back into the plastic envelope that they came in however I put the paper with the information about the dies behind the dies so you can easily see them.  I used my label maker to create labels for each one. I keep a small plastic "crate" on my desk to keep the stamp sets and framelit dies close at hand while I am using them.
Hope this information is useful.

Happy Stamping!


Don't forget to use this month's Hostess Code: EK69CKQD to receive your FREE gift.

Click HERE  for details on the Host Code

Laura Morris
Independent Stampin' Up! Demonstrator
www.borntoscrapbook.blogspot.com

Thursday, September 27, 2018

Pumpkin Centerpiece Using Country Lane DSP and Mason Jar Bands - DIY


One of the September challenges in our Stampin' Up! group was to make a home decor project. For this project I tried something new for me, making a pumpkin centerpiece made of 22 wide mason jar bands. Instead of painting the bands I used 1/2" strips of Country Lane Designer Series Paper (#147804 - page 43 Holiday Catalog). String all of the bands together using hemp, yard or wire and tie a knot tightly to form a circle. For the stem I used a piece of Crumb Cake cardstock and covered it with hemp wired ribbon. For the leaves I used Cajun Craze cardstock, cut out two ovals and ran them through the Swirls & Curls Impressions Embossing Folder.

Wide Mason Jar Bands


Enjoy!

Don't forget to use this month's Hostess Code: EK69CKQD to receive your FREE gift.

Click HERE  for details on the Host Code

Laura Morris
Independent Stampin' Up! Demonstrator
www.borntoscrapbook.blogspot.com

Wednesday, September 26, 2018

First Frost Congratulations Cards - DIY

Aren't these roses beautiful! I love the way the First Frost stamp set stamps (page 36-37 Frosted Floral Suite - Holiday Catalog) do all the shading work for you. Even on the greenery. This card took only minutes to make.  I was inspired to make these cards after seeing one of them on Peggy Noe's Pinterest board only I stamped some greenery on a separate piece of card stock, cut it out with the Frosted Bouquet Framelits Dies (page 37 Holiday Catalog) and then adhered it to the card to give it some dimension. 

This close up captures the layer of greenery to give it more dimension. 

The card on the left has the added dimension and the one of the right does not.
All of the roses have Wink of Stella for a little shimmer.

Step-By-Step Tutorial:
  • Create a 4 1/4 x 5 1/2 card base using Stampin' Up! Whisper White card stock and the Stampin' Trimmer.
  • Cut out another piece of Whisper White card stock, 5 1/4 x 4 for the matting and stamping.
  • Stamp the greenery with the First Frost stamp set - #148420 Holiday Catalog (I used Mint Macaron) onto the matting piece of card stock.
  • Stamp three larger roses and two smaller roses with the First Frost stamp set - #148420 Holiday Catalog (I used Flirty Flamingo) on a separate piece of Whisper White card stock along with the sentiment "Congratulations".
  • Cut out the roses and greenery using the coordinating Frosted Bouquet Famelits Dies (page 37 Holiday Catalog). You save 10% if you buy the stamp set and framelits as a bundle. I cut out the sentiment using the Stampin' Trimmer.
  • Now adhere the roses and the one piece of greenery on top of the stamped greenery using Stampin' Dimensionals.
  • Lastly I adorned each rose with a little Wink of Stella for a touch of shimmer.
Enjoy and happy Stamping!!


Don't forget to use this month's Hostess Code: EK69CKQD to receive your FREE gift.

Click HERE  for details on the Host Code

Laura Morris
Independent Stampin' Up! Demonstrator
www.borntoscrapbook.blogspot.com

Tuesday, September 25, 2018

DIY Succulent Pumpkin Centerpiece


Since we are into the first week of fall already, I decided to make a centerpiece using a craft pumpkin, live cacti and moss. I was inspired to make this centerpiece from a photo I saw on Pinterest. 

Click HERE for the blog post and details on how to make this super cute centerpiece.


Laura Morris
Independent Stampin' Up! Demonstrator
www.borntoscrapbook.blogspot.com

New Stampin' Up! Stamparatus Accessories

Stamparatus Accessories will be available to Customers to purchase beginning Oct. 1, 2018.

This is the Stamparatus positioning tool. Great for perfectly aligning stamp images, stamping multiples of the same project quickly and precisely and for getting complete ink coverage. It works well with clear-mount rubber stamps and photopolymer stamps. 
Stamparatus tool (Page 207 Annual Catalog) comes with the Stamparatus is two plates, two magnets and a foam mat. #146276/$49.00 (TIP: Make sure the magnets are not placed on top of each other.  They are very strong and difficult to separate. Magnets may break while being forced apart).

Stamparatus 
Are you new to the Stamparatus? Here's a video on why you need one:


Beginning on October 1st, 2018 customers will be able to purchase the following Stamparatus Accessories

Stamparatus Accessories Pack (Imperial) - Includes Stamparatus plates (Imperial), grid paper, foam mat
#151049/$24.50

Stamparatus Plates (Imperial) - Additional plates allow you to have multiple stamp arrangements ready to go! (2 plates)
#149693/$15.00 

Stamparatus Foam Mat - Extra foam mat for photopolymer stamping. (1 mat)
#150081/$3.00 


Magnets for the Stamparatus. Man these things are strong! Rare earth magnets are great but are brittle by nature. (2 magnets)
#148213/$12.00 
Small Grid Paper - Grid paper perfectly sized to fit the Stamparatus, for precision stamp alignment every time. (50 sheets)
#149621/$6.50 
Don't forget to use this month's Hostess Code: EK69CKQD to receive your FREE gift.

Click HERE  for details on the Host Code.

Laura Morris
Independent Stampin' Up! Demonstrator
www.borntoscrapbook.blogspot.com

Monday, September 24, 2018

Sincerely Santa Project Kit - DIY ChristmasTags

Yesterday it  was a rainy day here where we live in south Florida so I decided to take out the Sincerely Santa Project Kit  (page 32 Holiday Catalog) and get a head start on creating my Christmas tags. Here's how they came out.  So pretty.

Each kit included:
  • 30 printed tags 4" x 2" and 3 9/16" x 3 1/4"
  • Cardstock, gold foil, and silver foil die-cut elements
  • Garden Green 3/8" ribbon
  • Real Red 3/8" ribbon
  • White Baker's Twine
  • Mini jingle bells
  • Printed candy-striped tin
  • Printed instruction guide

Here's the complete kit. It even comes with a nice tin to store your tags in.

All you need to complete the kit is the Sincerely Santa stamp set (page 32 Holiday Catalog),
Garden Green #147089, Cherry Cobbler #147083 and your adhesive.

First I took out all of the tags and stamped them by color.
I then collected all the supplies for each tag design (five total) and placed them into separate piles.

I also stamped To: and From: on the back of each tag.


Sale: $5.40
Price: $9.00
Sale: $3.40
Price: $8.50
Sale: $1.20
Price: $3.00
Sale: $3.20
Price: $8.00
Sale: $10.80
Price: $18.00
Sale: $18.60
Price: $31.00
Sale: $10.80
Price: $18.00
Sale: $15.00
Price: $25.00
Sale: $2.80
Price: $7.00
Sale: $2.40
Price: $6.00
Sale: $3.50
Price: $7.50
Sale: $2.00
Price: $5.00
Sale: $2.80
Price: $7.00
Sale: $2.00
Price: $5.00
Sale: $1.60
Price: $4.00
Sale: $12.00
Price: $20.00
Sale: $2.40
Price: $6.00
Sale: $10.80
Price: $18.00
Sale: $22.80
Price: $38.00
Sale: $16.20
Price: $27.00
Sale: $2.00
Price: $5.00
Sale: $2.40
Price: $6.00
Sale: $3.00
Price: $7.50
Sale: $24.00
Price: $40.00
Sale: $1.20
Price: $3.00
Sale: $1.20
Price: $3.00
Sale: $18.00
Price: $30.00
Sale: $1.60
Price: $4.00
Sale: $3.60
Price: $9.00


Don't forget to use this month's Hostess Code: EK69CKQD to receive your FREE gift.

Click HERE  for details on the Host Code.

Laura Morris
Independent Stampin' Up! Demonstrator
www.borntoscrapbook.blogspot.com