Sunday, January 27, 2019

Wishing You Well Card Tutorial


Well...you know what they say, troubles happen in threes. That was definitely the case this week. Two people ended up in the hospital and one person is under the weather. Here's a card that I made for one of the people that ended up in the hospital. I was inspired by a card created by another demonstrator, Mary Fish, and changed mine up just a bit.
  1. Cut a piece of Whisper White cardstock to 5 1/2" x 4 1/4" for the card base and score it down the middle using the Stampin' Trimmer.
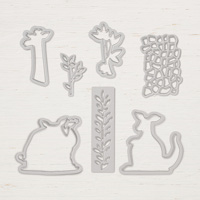
  2. With the NEW Rectangle Stitched Framlits Dies (Love love this set!), cut out a piece of Grapefruit Grove cardstock using the largest rectangle and use the next size down to cut out a piece of Whisper White cardstock.
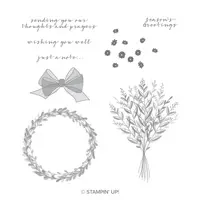
  3. Using the Stamparatus stamp positioning tool, stamp the bouquet image in Lemon Lime Twist ink and the flowers in Grapefruit Grove ink onto the Whisper White cardstock. The Stamparatus is great for perfect placement. Next stamp the "Wishing You Well" sentiment in Tuxedo Black Memento ink underneath. 
  4. Adhere the layers to the card base using either Snail or Liquid adhesive.
  5. Stamp the bow in Grapefruit Grove ink onto a scrap of Whisper White cardstock and snip it out with the Paper Snips. Adhere the bow as shown with a Mini Stampin' Dimensionals.
  6. Easily adhere a Grapefruit Grove Gingham Gala Adhesive-Backed Sequin to the center of the bow.

Above is a great video introducing you to the Stamparatus.


  • Shop My Online Store HERE
  • My Blog: www.borntoscrapbook.blogspot.com
  • January Hostess Reward Code: YNKUUA2X
  • Check out the Clearance Rack to save up to 70%.
  • Save 10% on Coordinating Product Bundles
  • Click HERE to subscribe to Paper Pumpkin.
  • Click HERE to join my team.
Laura Morris
Independent Stampin' Up! Demonstrator
www.borntoscrapbook.blogspot.com

Tuesday, January 22, 2019

Paper Pumpkin January 2019 - Be Mine Valentine Tutorial

Aren't these adorable!! This kit makes 24 double-sided pillow boxes.
The January 2019 Paper Pumpkin kit arrived in the mailbox the other day. Click HERE to see my post and video. Every year my husband and I host a Valentine's Brunch for our family and friends. These adorable pillow boxes will be perfect treat gifts. See below for my tutorial on how to quickly assemble these adorable treat pillow boxes.


I started by removing the labels and stamping them with different sentiments from the stamps provided in the kit. The ink spot also included is Melon Mambo.

Remove the heart and circle scallop pieces. They press out so easily. Then adhere the die-cut animal pieces using dimensionals.

Adhere the kangaroo and chameleons to the stitched heart and circle pieces using adhesive dots, also included.

Next I adhered the sentiments to the kangaroo and chameleon pieces using adhesive dots and placed hearts on each kangaroo.

Now adhere enamel hearts, also included, to scallop heart and circle pieces.

Place adhesive strips, included, on the long side of the pillow boxes (either side).

Assemble pillow boxes.

Fill pillow boxes with treats and adhere embellished scallop label to pillow boxes using dimensionals.

Enjoy the short video with more information on this amazing kit!


The January 2019 Be Mine Valentine kit also coordinates with the Animal Expedition Suite on page 26-27 of the annual catalog. Click on any of the images below for more details.


Click HERE  for Paper Pumpkin subscription details.

  • Shop My Online Store HERE
  • My Blog: www.borntoscrapbook.blogspot.com
  • January Hostess Reward Code: YNKUUA2X
  • Check out the Clearance Rack to save up to 70%.
  • Save 10% on Coordinating Product Bundles
  • Check out all the New Cling Stamps HERE
  • Click HERE to subscribe to Paper Pumpkin.
  • Click HERE to join my team.
Laura Morris
Independent Stampin' Up! Demonstrator
www.borntoscrapbook.blogspot.com

Thursday, January 17, 2019

Stampin' Up! Paper Pumpkin January 2019 - Be Mine Valentine Video


It's here! Today the January 2019 Paper Pumpkin kit arrived in my mailbox. Every year my husband and I host a Valentine's Brunch for our family and friends. These adorable pillow boxes will be perfect treat gifts. Check out my sneak peek video below.  Sorry it recorded sideways. 


Paper Pumpkin is the perfect way to jump into the world of paper crafting and get your creative “me-time” every month. Included are all the stamps, ink, and paper you need to create a fun project, without any stress. Everything is precut and ready to go so you can skip to the fun part of crafting! Subscribers always have cards and cute gifts on hand for every occasion. Your first kit includes a free clear stamping block. You’ll also build a collection of stamps and ink to use on other projects. There’s no pressure—you can cancel or suspend at any time. Subscribe by the 10th of the month to get started!

Keep and eye out for a future post by me with photos of the finished pillow boxes.

Click HERE  for Paper Pumpkin subscription details.
  • Shop My Online Store HERE
  • My Blog: www.borntoscrapbook.blogspot.com
  • January Hostess Reward Code: YNKUUA2X
  • Check out the Clearance Rack to save up to 70%.
  • Save 10% on Coordinating Product Bundles
  • Check out all the New Cling Stamps HERE
  • Click HERE to subscribe to Paper Pumpkin.
  • Click HERE to join my team.
Laura Morris
Independent Stampin' Up! Demonstrator
www.borntoscrapbook.blogspot.com

Tuesday, January 15, 2019

New Cling Stamps - Step By Step Tutorial


Stampin' Up!'s classic red rubber stamps are now BETTER THAN EVER!! Introducing the new Cling Stamps!! The same quality rubber material you've always loved now comes with an adhesive image label that will cling like crazy to clear blocks (annual catalog page 206) or Stamparatus plates (annual catalog page 207) each and every time you use them.

For a complete list of the New Cling Stamps now available, click HERE.

Check out the below video for more details.


I was fortunate enough to receive the Humming Along stamp set during prize patrol during On Stage in Orlando this past November.

Here's some tips on getting the stamps ready for use the first time.
Remove each of the rubber stamps from the rubber sheet they are attached to. NOTE: Keep the rubber sheet for the last step.

Flip the image sheet over and remove the backing of each image.  Next remove the backing of each rubber stamp.

Now carefully place the rubber stamp down onto the image sheet. Lightly press down to adhere.

Lift each stamp off of the image sheet.

When you are finished, they should look like this.

Now place the stamps with images back into the rubber sheet for storage and put them back into their case.

While you don't have to keep the rubber sheet, I highly recommend that you do.  I didn't save the rubber sheet that came with my Meant To Be stamp set.  I sure wish I had as the images are VERY sticky and are very difficult to remove from the stamp case.

NOTE: If you need to clean the image labels, simply rinse under running water.  Avoid alcohol-based cleaners.
  • Shop My Online Store HERE
  • My Blog: www.borntoscrapbook.blogspot.com
  • January Hostess Reward Code: YNKUUA2X
  • Check out the Clearance Rack to save up to 70%.
  • Save 10% on Coordinating Product Bundles
  • Check out all the New Cling Stamps HERE
  • Click HERE to subscribe to Paper Pumpkin.
  • Click HERE to join my team.
Laura Morris
Independent Stampin' Up! Demonstrator
www.borntoscrapbook.blogspot.com

Monday, January 14, 2019

Meant To Be Valentines Card Tutorial

The All My Love Suite from the 2019 Occasions Catalog has to be one of my favorite suites in this catalog. The hearts and flowers in the All My Love Designer Series Paper are amazing.

For this card I used:
  • Card base - 8 1/2" x 5 1/2" piece of Flirty Flamingo cardstock from the All My Love cardstock pack (page 5 - Occasions catalog #148578).
  • Hearts - Whisper White #100730 Annual catalog and Lovely Lipstick cardstock (page 5 - Occasions catalog #148578).
  • Meant to Be Stamp Set & Be Mine Stitched Framelits Dies Bundle (page 6 - Occasions catalog #150587).
  • All My Love Designer Series Paper (page 5 - Occasions catalog #148576).
  • Lace Dynamic Textured Impressions Embossing Folder (page 11 - Occasions catalog #148530).
  • Gingham Gala Adhesive-Backed Sequins (page 35 - Occasions catalog #148561).
  • All My Love Ribbon Combo Pack (page 5 - Occasions catalog #148584).
I started off by cutting a 5 1/2" x 4 1/4" piece of Flirty Flamingo cardstock for the card base.
Next I cut a 5 1/4" x 4" piece of Flirty Flamingo cardstock for the matting. Both were cut using the Stampin' Trimmer - page 208 of the annual catalog, #126889.


I ran the matting through the Big Shot (page 214 Annual catalog, #143263) using the Lace Dynamic Textured Impressions Embossing Folder (page 11 - Occasions catalog #148530). Amazing transformation from a plain piece of cardstock to the stunning lace above.

The hearts were cut using the Be Mine Stitched Framelits Dies (page 6, Occasions Catalog) using Whisper White and Lovely Lipstick cardstock.

Card elements all cut and ready to go.

The sentiment was stamped using the "Happy Valentine's Day" stamp from the Meant to Be Stamp Set (page 6, Occasions catalog - #148626) using Flirty Flamingo #147052.


Both of the coordinating ribbon are from the All My Love Ribbon Combo Pack (page 5 - Occasions catalog #148584).

I cut a 1 1/4"x 4" piece of All My Love Designer Series Paper (page 5 - Occasions catalog #148576).

Layer/assemble as follows:
  • Start with card base.
  • Layer with embossed matting and slid Flirty Flamingo ribbon underneath the matting before adhering.
  • 1 1/4" x 4 piece of All My Love Designer Series paper gets adhered on top of matting.
  • Add the Lovely Lipstick ribbon on top of the designer series paper.
  • Tie the Flirty Flamingo ribbon into a bow.
  • Add the hearts popped up with Stampin' Dimensionals. 
  • Lastly, add the Gingham Gala Adhesive-Backed Sequins (page 35 - Occasions catalog #148561).


All the products that I used are listed below. You may click on any of the images for more details.


  • Shop My Online Store HERE
  • My Blog: www.borntoscrapbook.blogspot.com
  • January Hostess Reward Code: YNKUUA2X
  • Check out the Clearance Rack to save up to 70%.
  • Save 10% on Coordinating Product Bundles
  • Click HERE to subscribe to Paper Pumpkin.
  • Click HERE to join my team.
Laura Morris
Independent Stampin' Up! Demonstrator
www.borntoscrapbook.blogspot.com